|
|
|

|

|

|

|

|

|

|
Features:
- Extensively Tested During Manufacture to Guarantee Quality and Reliability
-
Supplied With a Factory-Fitted Connector for Easy Installation
-
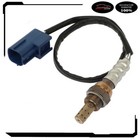
Precision manufactured with a sensing element incorporating premier technical ceramics
Where are my oxygen sensors located?

Diagnostic Trouble Codes (DTC)
When oxygen sensor failure occurs, a DTC is recorded in the Engine Control Unit (ECU) and a Malfunction Indicator Lamp (MIL) is illuminated on the dash, alerting the driver the vehicle has a problem.
How to replace an oxygen sensor?
1- Disconnect the battery.
2- Locate the sensor connector by following its wires. Disconnect it.?
3- Remove the sensor cable from its clips all along its way to the sensor.
4- A specific 22mm socket with side cut out exists (see below). You can use a spanner instead. Hold it in one hand and give it a firm hit with the other hand. It will then unscrew very easily.
5- Remove the sensor and fit the new one.
6- Re-route the cable carefully and meticulously and fix it at every clip. Reconnect the connector.
7- Reconnect the battery and wait 5 minutes before starting the engine.


Please take a video clip of the voltmeter and contact us if our sensor:
Goes above range between 0.1 and 0.9 volt
Remains below 0.5 volts
Stays fixed at a particular voltage
You're free to choose replacement or refund if our sensor fails to work, in this case.
1. We accept multiple payment methods.
3. Total amount due includes the final auction price plus S&H(Shipping and Handling).
If there have any question pls contact us first(send us ebay message),we will try our best to help!
1.Our shipping rates include the cost of shipping,handling,packaging and related manpower costs.
2.All item will be shipped by USPS&Fedex within 1 business days,It takes approximately 3-8 workdays.
3.We ship to US ONLY.
4.All items will be shipped to buy's paypal address.Please check your paypal address is right.
5.We are not responsible for wrong or undeliverable address.We reserve the right to charge the shipping fee again for returned items due to wrong address.
We stand behind every product we sell.
All of our brand new items come with a 30-Days money-back guarantee.
* Please let us to know if you have not received our feedback, we will give feedback manually.
* If you feel that we deserve a neutral or negative feedback, please, CONTACT US before leaving any feedback, give us a chance to make things right and leave your a good impression!
Shop Category Hot Item
Picture
New List Item
Help & Info Payment Policy Shipping Policy Return Policy FAQ About Us |
Oxygen O2 02 Sensor For Infiniti I35 Nissan Altima Maxima 3.5L Downstream
Features:
Where are my oxygen sensors located?
Diagnostic Trouble Codes (DTC)
How to replace an oxygen sensor?
1- Disconnect the battery. 2- Locate the sensor connector by following its wires. Disconnect it.? 3- Remove the sensor cable from its clips all along its way to the sensor. 4- A specific 22mm socket with side cut out exists (see below). You can use a spanner instead. Hold it in one hand and give it a firm hit with the other hand. It will then unscrew very easily. 5- Remove the sensor and fit the new one. 6- Re-route the cable carefully and meticulously and fix it at every clip. Reconnect the connector. 7- Reconnect the battery and wait 5 minutes before starting the engine.
Please take a video clip of the voltmeter and contact us if our sensor:
Goes above range between 0.1 and 0.9 volt 1. We accept multiple payment methods. 3. Total amount due includes the final auction price plus S&H(Shipping and Handling). If there have any question pls contact us first(send us ebay message),we will try our best to help! 1.Our shipping rates include the cost of shipping,handling,packaging and related manpower costs. We stand behind every product we sell. * Please let us to know if you have not received our feedback, we will give feedback manually. * If you feel that we deserve a neutral or negative feedback, please, CONTACT US before leaving any feedback, give us a chance to make things right and leave your a good impression! All rights reserved. |