


|
|
|

|

|

|

|

|

|

|

|

|

|

|

|

|

|

|

|

|

|

|
Please check fitment notes & description for accurate information.
2008-2009 Buick Allure 3.8L
2008-2009 Buick LaCrosse 3.8L
2002 Cadillac Escalade 6.0L
2002 Cadillac Escalade EXT 6.0L
2002 Chevrolet Avalanche 2500 8.1L
2000 Chevrolet C2500 7.4L
2000 Chevrolet C3500 7.4L
2001-2002 Chevrolet C3500 8.1L
2001-2002 Chevrolet C3500HD 8.1L
2001-2002 Chevrolet Express 3500 8.1L
2000 Chevrolet K2500 7.4L
2000 Chevrolet K3500 7.4L
2001-2002 Chevrolet Silverado 1500 HD 6.0L
2001-2002 Chevrolet Silverado 2500 6.0L
2001-2002 Chevrolet Silverado 2500 HD 6.0L
2001-2002 Chevrolet Silverado 2500 HD 8.1L
2001-2002 Chevrolet Silverado 3500 6.0L
2001-2002 Chevrolet Silverado 3500 8.1L
2001-2002 Chevrolet Suburban 2500 6.0L
2001-2002 Chevrolet Suburban 2500 8.1L
2000 GMC C2500 7.4L
2000 GMC C3500 7.4L
2001-2002 GMC C3500HD 8.1L
2000 GMC K2500 7.4L
2000 GMC K3500 7.4L
2001-2002 GMC Savana 3500 8.1L
2001-2002 GMC Sierra 1500 6.0L
2001-2002 GMC Sierra 1500 HD 6.0L
2001-2002 GMC Sierra 2500 6.0L
2001-2002 GMC Sierra 2500 HD 6.0L
2001-2002 GMC Sierra 2500 HD 8.1L
2001-2002 GMC Sierra 3500 6.0L
2001-2002 GMC Sierra 3500 8.1L
2001-2002 GMC Yukon 6.0L
2001-2002 GMC Yukon XL 1500 6.0L
2001-2002 GMC Yukon XL 2500 6.0L
2001-2002 GMC Yukon XL 2500 8.1L
2008 Pontiac Grand Prix 3.8L
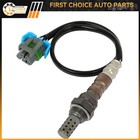
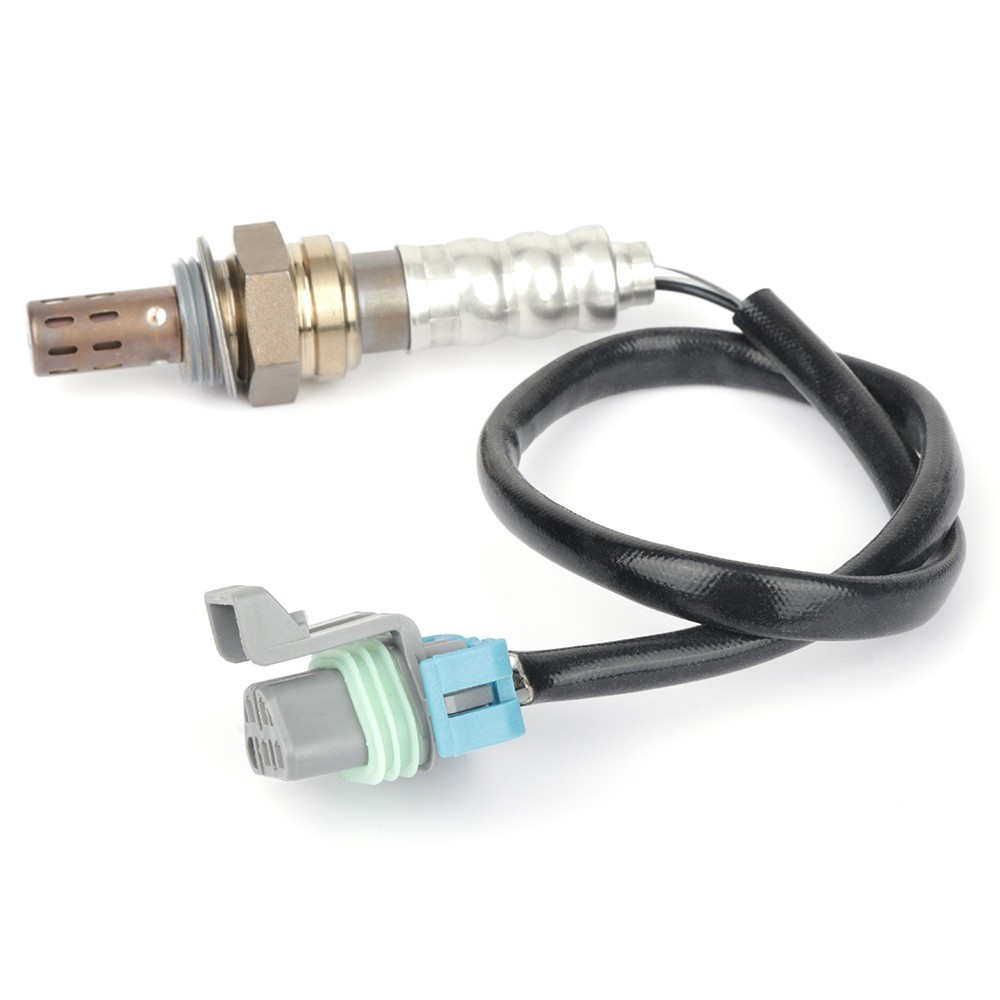
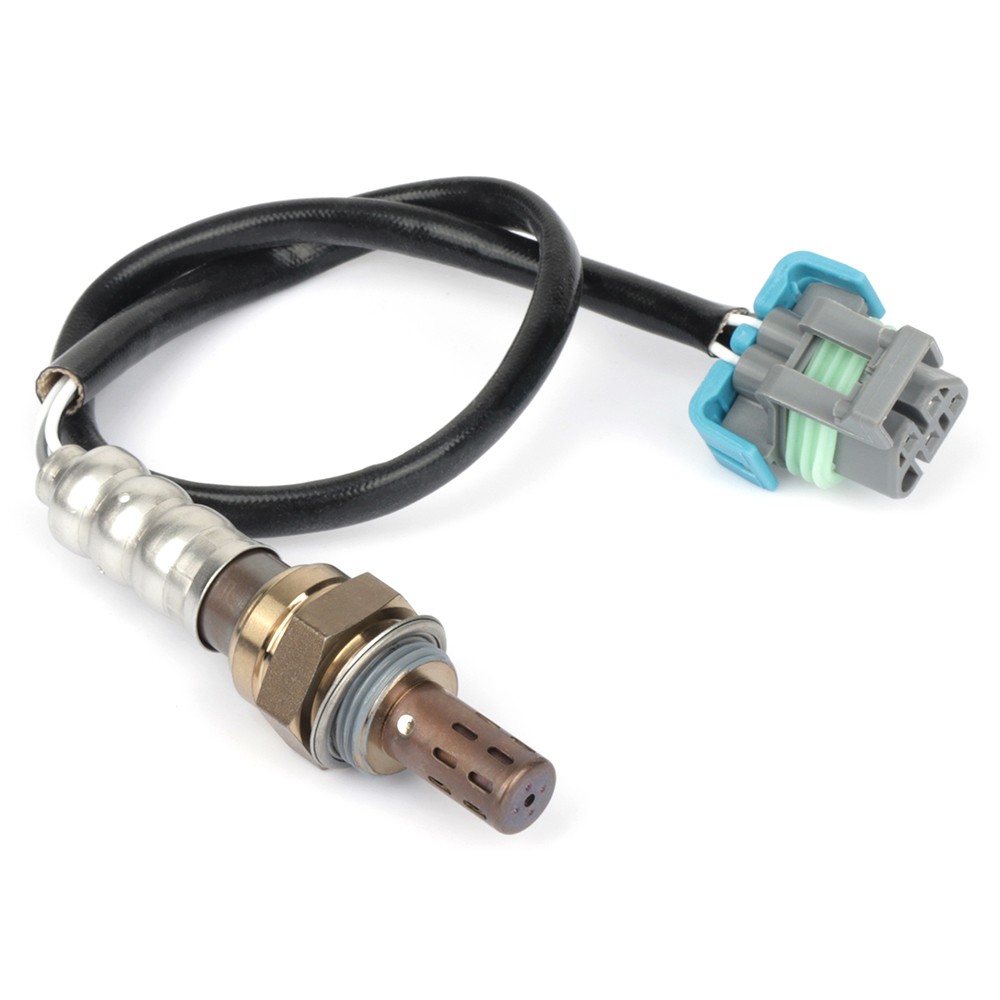
Oxygen Sensor's Location:


How do I know the O2 sensor is good or not?
Check engine light on
A reduction in fuel economy.
Your catalytic converter fails unexpectedly
Exhaust emissions reach undesirable levels.
How to install the oxygen sensor?
Step 1 - Some sensors are equipped with a heat shield that must be removed before the sensor removal, this is performed by removing any mounting bolts.
Step 2 - By using a regular socket it minimizes potential damage to the sensor body and the threads, this technique helps avoid stripping the old sensor upon removal.
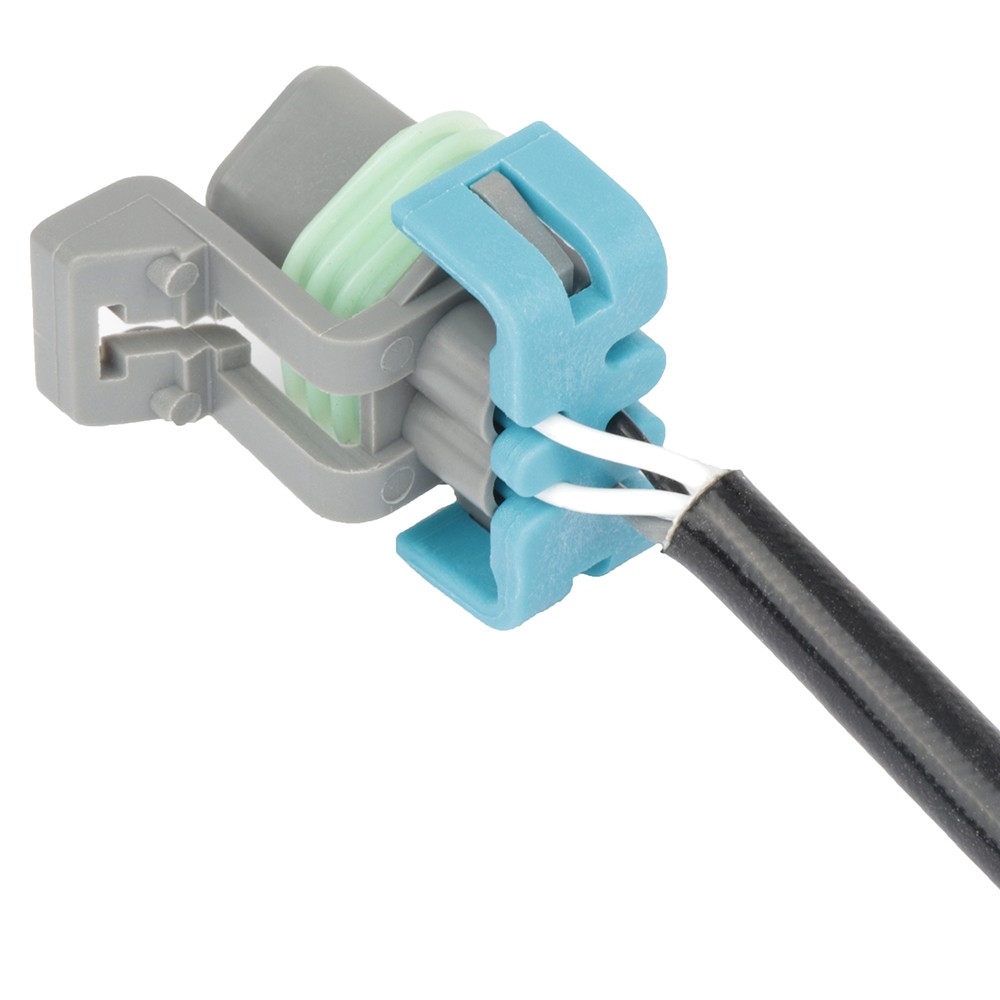
Step 3 - Then, locate and disconnect the wiring connector, this step should be done before removing the sensor if the wiring is still attached.
Step 4 - Its important that the wiring harness connectors are exactly the same, each sensor is unique to it's position and is located in the system by its connector configuration. (Note: some replacement sensors have a universal electrical connector that must be configured to the wiring of the old sensor.)
Step 5 - Use a small wire brush to help clean the threaded port to ensure a proper seal of the new sensor. Gently install the new oxygen sensor by hand while keeping the wiring and connector free from bends.
Step 6 - Gently tighten the sensor while keeping wiring free from damage, these sensors need to be fairly snug to avoid leakage.
Step 7 - Once the sensor is tightened, reinstall any heat shields or bracing that had to be removed.
Step 8 - After the heat shield has been reinstalled, mount the connector to it's holder and reattach the connector back onto the wiring harness. If the car has diagnostic trouble codes, they will need to be cleared.


Must Know Before Buying:
The following information is for instructional and guidance reference only. We try and make them as accurate as we can.
If Check Engine Light is on or an OBDII Trouble/Fault code occurs after installation, check the sensor with a voltmeter as below.
If the sensor is good, further diagnosis is required. There're many different codes for specific functional failures, which are NOT necessarily relevant to the sensor. Find out what the Code means before leaving any feedbacks.
Items that have been installed, altered or contaminated are non-returnable.
1. ONLY a defective sensor after tested by a voltmeter is applied to manufacturer warranty.
2. 20% restocking fee is required if buyer bought wrong items due to not paying attention to fitment information and ask for return.
The Price, Quality & Functionality of the O2 Sensor is fully covered under our warranty & return policy. However, refund for any labor cost, expense in a dealer shop or damage due to wrong installation is NOT covered.
| Item Specifics | |
|---|---|
| Brand | ORRIGEY |
| Manufacturer Warranty | 1 Year |
| Manufacturer Part Number | R115PA861S49 |
| Type | Oxygen Sensor |
| Interchange Part Number | o2 sensor cost, 02 sensor, heated oxygen sensor car |
| Other Part Number | 12563346,12565397,12565414,12616672, |
| Custom Bundle | No |
| Modified Item | No |
| Number of Pieces | 1 |
| Fitment Type | Direct Replacement |
| Thread Size | M18 |
| Terminal Type | Blade |
| Universal Or Specific Fit | Specific |
| Attachment Method | Screw-On |
| Connector Gender | Female |
| Wire Harness Length | 16.93 IN |
| Sensor Type | Heated |
| Wire Quantity | 4 |
| Output Signal Range | 0.2V To 0.8V |
| Mounting Type | Threaded |
| Pin Quantity | 4 |
| Position | Upstream, Downstream, Sensor 1, Sensor 2 |
| Type | Sensor |
| Features | Direct Fit |
1.We accept multiple payment methods
2. Payment must be made within 4 days of auction closing.
3. Total amount due includes the final auction price plus S&H (Shipping and Handling).
4. S&H will be determined based upon the ship to address.
PLEASE NOTE: S&H does not include duties, local taxes
Standard Order Processing time:
All items will ship within 24 hours (Monday - Friday).
Payment cleared/received on Friday will be shipped on the next business days (Monday or Tuesday)
We are not responsible for carrier transit time. This information is provided by the carrier and excludes weekends and holidays. Note that transit times may vary, particularly during peak periods or in climate weather conditions, and that delivery times frames will need to be extended for any processing time frames in excess of 1-2 business days.
International Shipping:
International buyers are responsible for possible customs fees, brokerage fees or duty fees. We would appreciate for understanding of tracking number would not be updated in between the city of departing in the U.S. and the city of destination.
Please notify us within 30 days after you've received your purchased item.
All return requests must be submitted through your eBay account.
If your order has been received and it is not what you ordered, or if your item has a manufacturer defect, please contact us as soon as possible,and then we will give you a resolution as soon as possible.
Items to be returned must be in resalable condition,30 Days money back, please notify us within 30 days after you've received your purchased item.
We maintain high standards of excellence (five stars review)and strive for 100% customer satisfaction! FEEDBACK IS VERY IMPORTANT TO US. We request that you contact us immediately BEFORE you give us neutral or negative feedback, so that we can satisfactorily address your concerns.
It is impossible to address issues if we do not know about them!
If you have any question,please don't be hesitated to contact us .We always strive for 100% customer satisfaction. With your support, we will make a progress everyday, we always grow up with you.
1. 12 months Manufacturer's Warranty for defective items (excluding items damaged and/or misused after receipt). Accessories come with a 3-month warranty.
2. Defective items must be reported and returned to us within the warranty period (and in the original packaging, if possible). You must tell us what the defect is and give us your eBay ID. we do not repair or replace items with an expired warranty.
You agree to all of the above-listed policies upon bidding on and winning this auction!
Upstream For 2002 Cadillac Escalade 6.0L V8 Oxygen O2 02 Sensor 1 Pre-Cat
Please check fitment notes & description for accurate information.
2008-2009 Buick Allure 3.8L
Oxygen Sensor's Location:
How do I know the O2 sensor is good or not?
How to install the oxygen sensor? Step 1 - Some sensors are equipped with a heat shield that must be removed before the sensor removal, this is performed by removing any mounting bolts.
Step 2 - By using a regular socket it minimizes potential damage to the sensor body and the threads, this technique helps avoid stripping the old sensor upon removal.
Step 3 - Then, locate and disconnect the wiring connector, this step should be done before removing the sensor if the wiring is still attached.
Step 4 - Its important that the wiring harness connectors are exactly the same, each sensor is unique to it's position and is located in the system by its connector configuration. (Note: some replacement sensors have a universal electrical connector that must be configured to the wiring of the old sensor.)
Step 5 - Use a small wire brush to help clean the threaded port to ensure a proper seal of the new sensor. Gently install the new oxygen sensor by hand while keeping the wiring and connector free from bends.
Step 6 - Gently tighten the sensor while keeping wiring free from damage, these sensors need to be fairly snug to avoid leakage.
Step 7 - Once the sensor is tightened, reinstall any heat shields or bracing that had to be removed.
Step 8 - After the heat shield has been reinstalled, mount the connector to it's holder and reattach the connector back onto the wiring harness. If the car has diagnostic trouble codes, they will need to be cleared.
Must Know Before Buying:
The following information is for instructional and guidance reference only. We try and make them as accurate as we can.
If Check Engine Light is on or an OBDII Trouble/Fault code occurs after installation, check the sensor with a voltmeter as below.
Items that have been installed, altered or contaminated are non-returnable.
1. ONLY a defective sensor after tested by a voltmeter is applied to manufacturer warranty.
The Price, Quality & Functionality of the O2 Sensor is fully covered under our warranty & return policy. However, refund for any labor cost, expense in a dealer shop or damage due to wrong installation is NOT covered.
1.We accept multiple payment methods Standard Order Processing time: International Shipping: Please notify us within 30 days after you've received your purchased item. If your order has been received and it is not what you ordered, or if your item has a manufacturer defect, please contact us as soon as possible,and then we will give you a resolution as soon as possible. Items to be returned must be in resalable condition,30 Days money back, please notify us within 30 days after you've received your purchased item. We maintain high standards of excellence (five stars review)and strive for 100% customer satisfaction! FEEDBACK IS VERY IMPORTANT TO US. We request that you contact us immediately BEFORE you give us neutral or negative feedback, so that we can satisfactorily address your concerns. It is impossible to address issues if we do not know about them! If you have any question,please don't be hesitated to contact us .We always strive for 100% customer satisfaction. With your support, we will make a progress everyday, we always grow up with you. 1. 12 months Manufacturer's Warranty for defective items (excluding items damaged and/or misused after receipt). Accessories come with a 3-month warranty. Copyright of ORRIGEYPARTS_All rights reserved. |
Shop Category Hot Item
Picture
New List Item
|