


|
|
||||||

|

|

|

|
|||


Item Description:
Front-wheel drive cars—as well as many four-wheel drive and all-wheel drive vehicles—use a pair of CV axles to transfer power to the front drive wheels.
In a front-wheel drive layout, the CV axles connect the transaxle to the wheel hubs. Rotational force from the engine is transferred to the transaxle, which, in turn, transfers that force to the CV axles. The CV axles then turn the wheel hubs, which serve as a mounting point for the wheel and tire assemblies.
Each CV axle has an inner and outer CV joint. The joints allow the CV axle shaft to move up and down as the vehicle travels over bumps. Also, the outer joints pivot to allow the front wheels to turn. Grease-filled boots cover the inner and outer joints.
Item Features:
Total New and High Quality
Fast Shipping and Good Operation
Manufactured Under Strict Quality Control
100% Brand New & High Performance
Stable Characteristics and High Reliability
Easy To Install, Perfectly Fit In Your Vehicle
How to Installation CV Axle:
1.Compare the new CV axle to the old CV axle to ensure both are the same design.
2.Slide the inboard end of the axle into position inside the transaxle. Be careful not to damage the output seal in the process.
3.Push the inboard end of the axle into the transaxle until the retaining ring snaps into place. If you can’t push the axle into place by hand, you may need to use a dead blow hammer on the outboard end of the axle to tap the axle into position.
4.Make sure the axle is fully seated and flush with the transaxle. Double-check that the axle is seated properly by grasping the portion closest to the transaxle and pulling it outward. The CV axle should remain firmly in place.
5.Slide the outboard end of the axle into the hub.
6.Slide the ball joint stud into the steering knuckle.
7.Reinstall the hub nut loosely by hand. Do not tighten the hub nut down at this time.
8.Install the castle nut on the ball joint stud. Use a torque wrench to tighten the castle nut to the manufacturer’s specification.
9.Install a new cotter pin into the castle nut.
10.Reinstall the wheel/tire assembly on the lug nuts.
11.Tighten the lug nuts until they’re snug using a ratchet and socket.
12.Safely remove the jack stands and lower the vehicle.
13.Use a torque wrench to tighten the lug nuts to the manufacturer’s specification.
14.Use a torque wrench to tighten the hub nut to the manufacturer’s specification.
15.Reinstall the hub cap or center cap onto the wheel.
16.Check the transmission fluid level and top it off as needed.
Notice:
1.Prior to buying,
Please check your vehicles compatibility on the chart above .
If your car does not appear on the compatibility chart,
it is not compatible with your vehicle.
2.Prior to buying,
Please check your old number and pictures.
If your old product pictures is not same with the item picture,
it doesn't fit your vehicle.
| Item Specifics | |
|---|---|
| Brand | hdautoworld |
| Manufacturer Part Number | HD83570101S |
| Placement on VehicLe | Rear Left Right |
| Quantity | 2 |
| Interchange Part Number | 1333081 |
| Other Part Number | 1333081 |
| Superseded Part Number | 1333081 |
| Colour | Black |
| Attention | Please provide us your VIN# for us double check.thanks |
| Bundle Listing | No |
| Warranty | 1 Year |
| Surface Finsh | Painting |
| Fits | ATV |
| OE Spec or Performance/Custom | Performance/Custom |
1. We accept multiple payment methods.
2. Payment must be made within 4 days of auction closing.
3. Total amount due includes the final auction price plus S&H(Shipping and Handling).
1.Our shipping rates include the cost of shipping,handling,packaging and related manpower costs.
2.All item will be shipped by USPS&Fedex within 1 business days,It takes approximately 3-8 workdays.
3.We ship to US ONLY.
4.We are not responsible for wrong or undeliverable address.We reserve the right to charge the shipping fee again for returned items due to wrong address.
We stand behind every product we sell.
All of our brand new items come with a 30-Days money-back guarantee.
If there have any question pls contact us first(send us ebay message),we will try our best to help!
1.Once we have received your order, a feedback will be automatically sent to you.
2.Please let us to know if you have not received our feedback, we will give feedback manually.
3.If there's any question or problem before leaving feedback, feel free to contact us please, we will try our best to solve it.
Shop Category Hot Item
Picture
New List Item
Help & Info Payment Policy Shipping Policy Return Policy FAQ About Us |
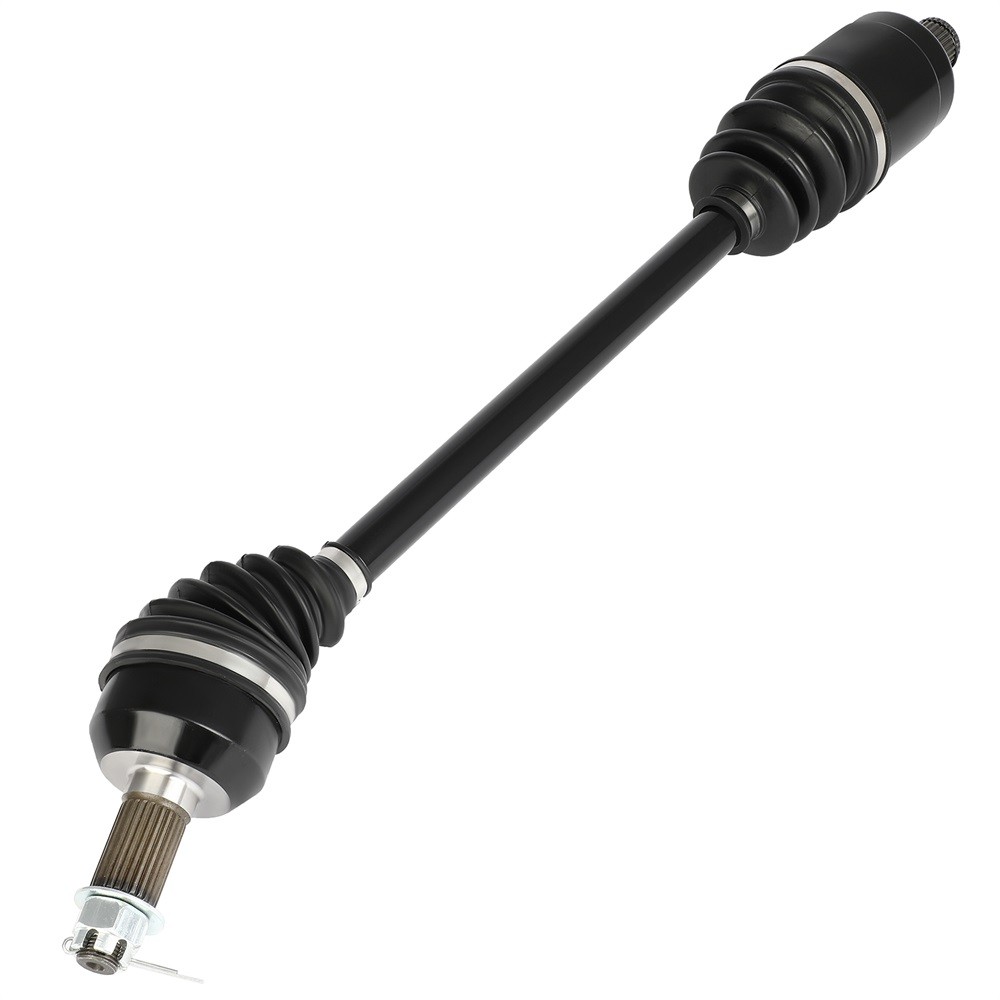
2Pcs Rear Left Right Fits 2016-2018 Polaris RZR S 900 EPS CV Axles Half Shaft
Item Description:
Front-wheel drive cars—as well as many four-wheel drive and all-wheel drive vehicles—use a pair of CV axles to transfer power to the front drive wheels.
In a front-wheel drive layout, the CV axles connect the transaxle to the wheel hubs. Rotational force from the engine is transferred to the transaxle, which, in turn, transfers that force to the CV axles. The CV axles then turn the wheel hubs, which serve as a mounting point for the wheel and tire assemblies.
Each CV axle has an inner and outer CV joint. The joints allow the CV axle shaft to move up and down as the vehicle travels over bumps. Also, the outer joints pivot to allow the front wheels to turn. Grease-filled boots cover the inner and outer joints.
Item Features:
Total New and High Quality
Fast Shipping and Good Operation
Manufactured Under Strict Quality Control
100% Brand New & High Performance
Stable Characteristics and High Reliability
Easy To Install, Perfectly Fit In Your Vehicle
How to Installation CV Axle:
1.Compare the new CV axle to the old CV axle to ensure both are the same design.
2.Slide the inboard end of the axle into position inside the transaxle. Be careful not to damage the output seal in the process.
3.Push the inboard end of the axle into the transaxle until the retaining ring snaps into place. If you can’t push the axle into place by hand, you may need to use a dead blow hammer on the outboard end of the axle to tap the axle into position.
4.Make sure the axle is fully seated and flush with the transaxle. Double-check that the axle is seated properly by grasping the portion closest to the transaxle and pulling it outward. The CV axle should remain firmly in place.
5.Slide the outboard end of the axle into the hub.
6.Slide the ball joint stud into the steering knuckle.
7.Reinstall the hub nut loosely by hand. Do not tighten the hub nut down at this time.
8.Install the castle nut on the ball joint stud. Use a torque wrench to tighten the castle nut to the manufacturer’s specification.
9.Install a new cotter pin into the castle nut.
10.Reinstall the wheel/tire assembly on the lug nuts.
11.Tighten the lug nuts until they’re snug using a ratchet and socket.
12.Safely remove the jack stands and lower the vehicle.
13.Use a torque wrench to tighten the lug nuts to the manufacturer’s specification.
14.Use a torque wrench to tighten the hub nut to the manufacturer’s specification.
15.Reinstall the hub cap or center cap onto the wheel.
16.Check the transmission fluid level and top it off as needed.
Notice:
1.Prior to buying,
Please check your vehicles compatibility on the chart above .
If your car does not appear on the compatibility chart,
it is not compatible with your vehicle.
2.Prior to buying,
Please check your old number and pictures.
If your old product pictures is not same with the item picture,
it doesn't fit your vehicle.
1. We accept multiple payment methods. 2. Payment must be made within 4 days of auction closing. 3. Total amount due includes the final auction price plus S&H(Shipping and Handling). 1.Our shipping rates include the cost of shipping,handling,packaging and related manpower costs. We stand behind every product we sell. If there have any question pls contact us first(send us ebay message),we will try our best to help! 1.Once we have received your order, a feedback will be automatically sent to you. 2.Please let us to know if you have not received our feedback, we will give feedback manually. 3.If there's any question or problem before leaving feedback, feel free to contact us please, we will try our best to solve it. All rights reserved. |
||||||||||||||||||||||||||||||||||||||||||||||||||||||||||||||||||||||||||||||||