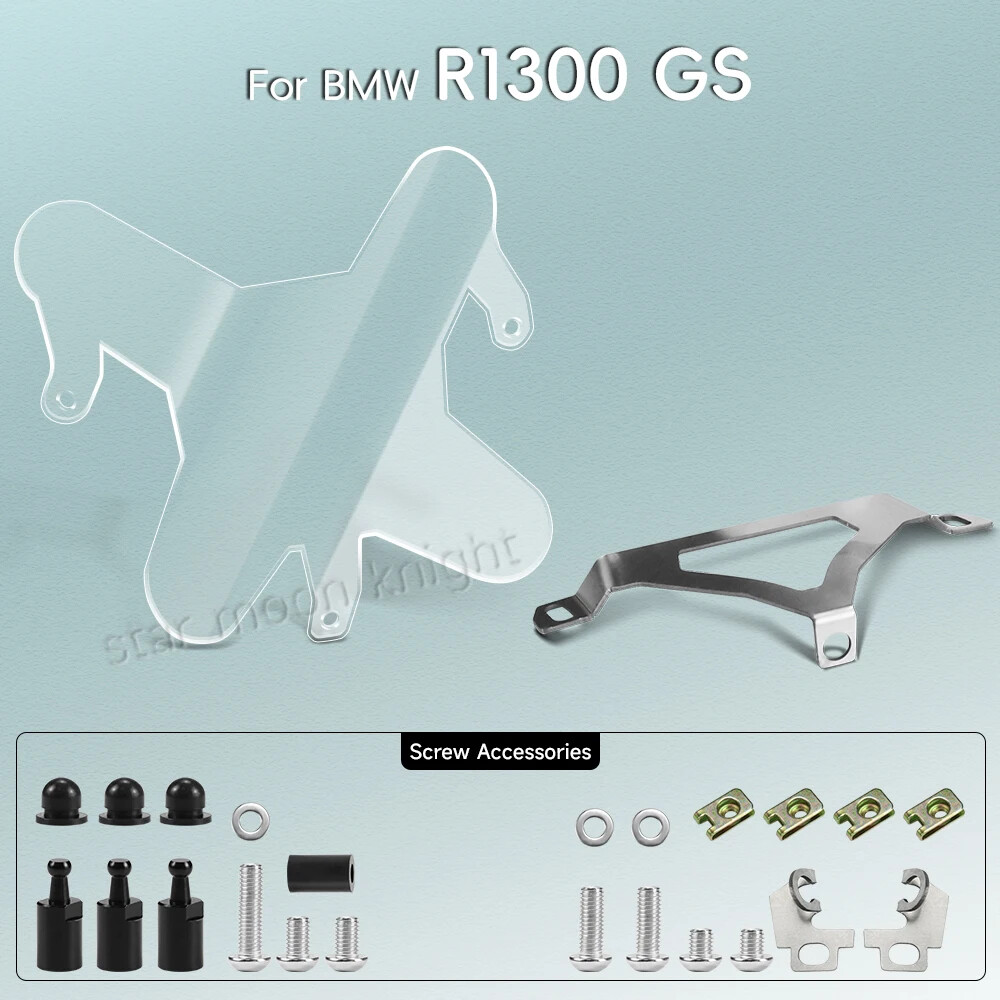
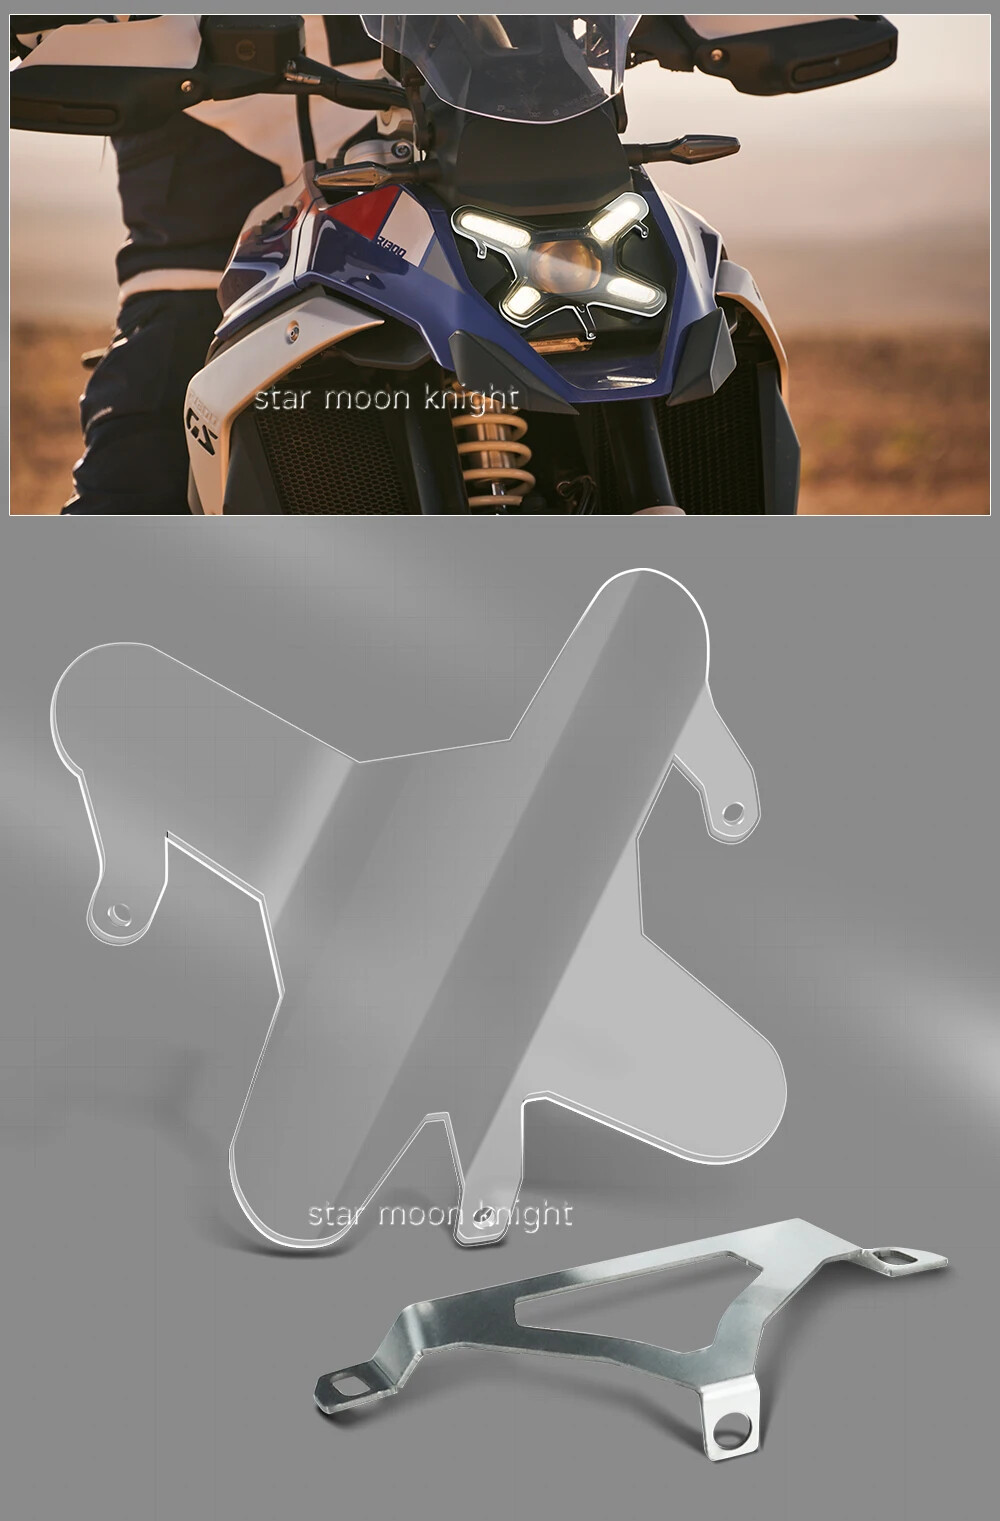
Installation Instructions
Step 1: Disassemble the front cover (some brands require disassembly)
Taking Wunderlich/Touratech/Lone Rider as an example:
Use T25 to unscrew the 2 plastic rivets/screws under the headlight and on the upper part of the front fender (bird's beak).
Gently open the buckle and remove the front fender cover/central trim panel (for easy installation of the bottom bracket).
(Optional) If the bracket needs to be fixed on the dashboard/upper part of the headlight, unscrew the two T25 screws on the upper part of the headlight and loosen the edge of the front fairing.
Step 2: Install the fixed bracket (key)
Install the upper bracket
Align the bracket with the left and right factory reserved holes/screw posts on the upper part of the headlight.
Insert the gasket and shock-absorbing rubber ring, insert the screw, tighten it by hand, and do not completely lock it.
Install the lower bracket
The lower bracket is fixed at the original hole position of the headlight bottom/front fender crossbeam.
Similarly, tighten the screws to keep the bracket in a fine adjustable state.
Bracket positioning
Ensure that the left and right brackets are symmetrical, horizontal, and evenly spaced from the edge of the headlights.
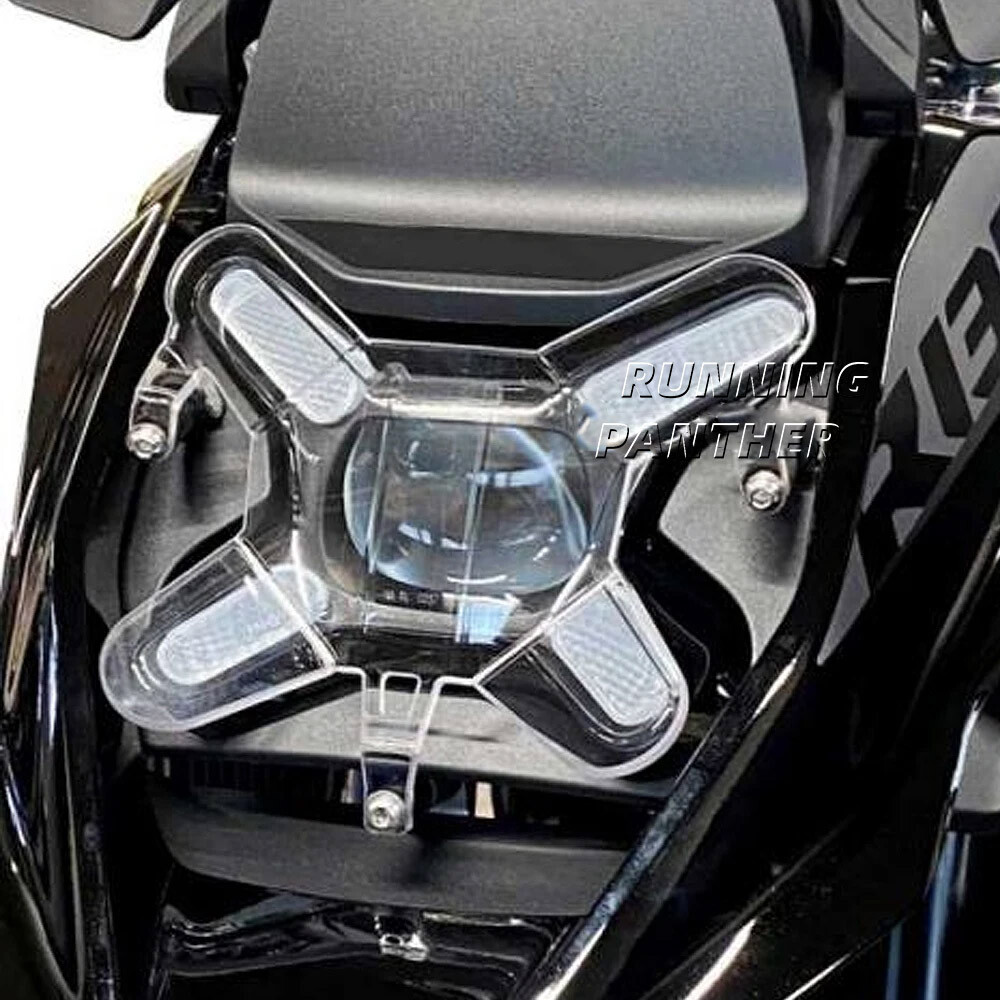
Step 3: Install the acrylic transparent cover
Option A: Buckle/Quick Release (Wunderlich Snaploc) ®、 Touratech)
Insert the rubber quick release buckle/slot on the upper part of the protective cover into the bracket.
Align the lower part with the positioning hole of the bracket, gently press it into place, and hear a "click" to tighten it.
Fine tune the position of the protective cover to ensure it is completely centered, does not rub against the headlights, and is not skewed.
Option B: Screw fixed type (R&G, WRS, ordinary acrylic)
Insert the protective cover into the bracket and align it with the screw holes.
Insert screws and washers, and tighten them by hand.
Adjust the shield horizontally/vertically to ensure no stress, no headlights, and consistent edge clearance.
Step 4: Locking screws and torque specifications
Bracket → body: M5 screw ≈ 2 Nm
Shield → bracket: M6 screw ≈ 2.5 Nm
Strictly prohibited from being too tight: Acrylic/PC materials may experience stress cracking.
Shake test after locking: The protective cover is stable, without abnormal noise, and does not touch the headlights.
Step 5: Restoration and Inspection
Reinstall the front mudguard/center trim panel and tighten the T25 screws.
Final inspection
The protective plate has no scratches, fingerprints, or bubbles.
Headlights on: No ghosting, no glare, and normal beam.
Driving test: No abnormal noise or looseness during low-speed bumps.
-
1. Payment methods accepted: Payoneer. Our Payoneer account allows you to pay by credit card, debit card and your paypal balance.
2. All major credit cards are accepted through our secure payment processor Payoneer.
3. We ship items to Your Ebay address.Please make sure your Ebay address is correct before you pay, cause it cannot be changed once the order shipped out.